Fix Your First Misconfiguration Using Monokle Cloud
In this tutorial you will learn how to improve the quality of your Kubernetes configuration by fixing your first misconfiguration.
Prerequisites
Step-by-step Instructions
1. Validation Overview
Monokle Cloud identifies validation errors based on Kubernetes schema and the basic policies enabled during the initial setup process and addition of a project repository to your account. Identified errors can be fixed in Monokle Cloud’s IDE. Monokle provides an Audit section in the toolbar for viewing validation errors and warnings. In this section you can also see context, for faster remediation and leverage the in app editor for quick fixes.
In the Audit section, view errors, warnings, and the policies applied under Validation Overview. Click on any error to view details.
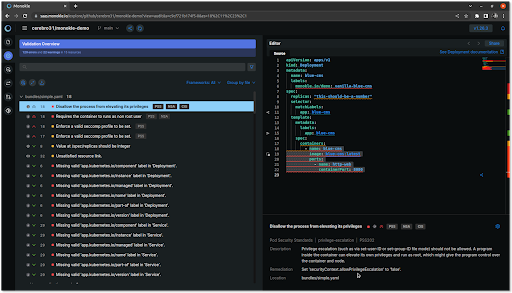
The above snippet is an example of how Monokle highlights the lines with errors in the Editor.
2. Fixing a YAML validation errors in Monokle Cloud
Hover over to any error for context and a detailed description of the error.
In the example case below, Disallow the process from elevating its privileges is an error shown along with the remediation for bundles/simple.yaml. Let’s have a closer look at the error description and remediation. This is a Pod Security Standards PS202 issue which prohibits a program inside the container to elevate its privileges and run as root.

Monokle suggests setting securityContext.allowPrivilegesEscalation to false. Let’s fix the validation error in the Monokle Cloud Editor using the suggested remediation.
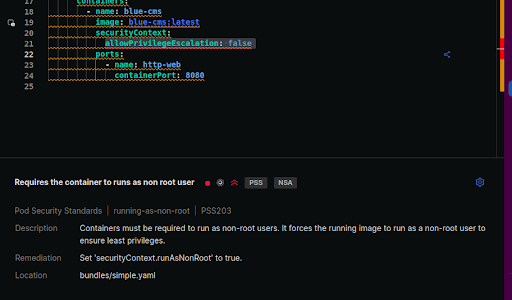
To make the change, click on the error and make edits directly in the editor. As soon as the fix has been made, Monokle reads the changes in real time and highlights the updated changes.
Another error, Required the container to run as non root user appears. Let’s make use of the remediation suggestion to set securityContext.runAsNonRoot to true by using the Editor to fix thise error also.
Set securityContext.runAsNonRoot to true using the Editor.
Great work! You have successfully fixed the error. The YAML manifest in bundles/simple.yaml is now error-free based on policies enabled.
Similarly, make use of the validation overview to view all the errors or warnings and fix them with the help of remediation.
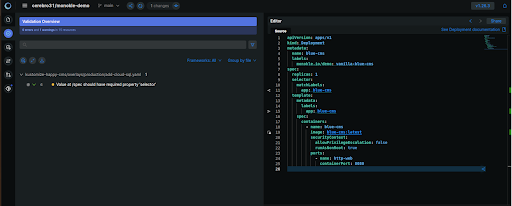
Once all the required changes have been made, directly commit the changes to the repository and raise a PR to merge using Monokle Cloud.
3. Commit changes and raise PR
Monokle identifies the changes and enables a 1-click button to track the total number of changes pending, stage and commit them all in one easy step. all the pending changes. It also mentions the number of changes.
Click on Stage and commit all changes with 1 click to initiate the commit process.
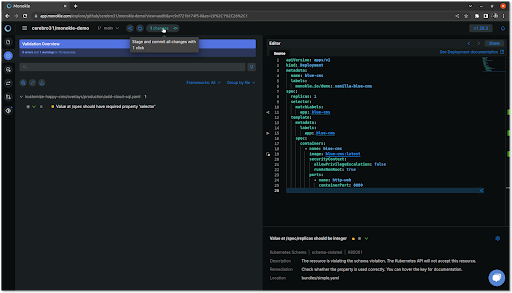
Enter the commit details in the pop-up window. To start a Pull Request(PR), select the Create a new branch option.
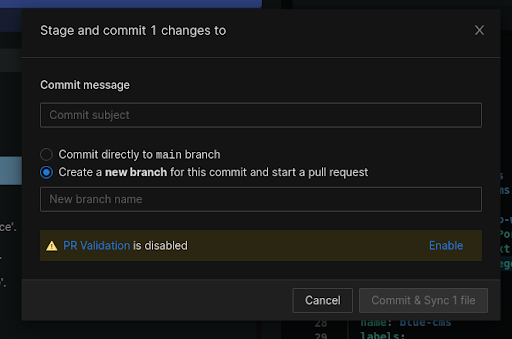
Tip: You can also automate PR validation using GitBot in Monokle Cloud by clicking the Enable button.
Click Commit & Sync 1 file.
Note: This step will open another window for PR details. Make sure the pop-up window is allowed for Monokle Cloud.
Add the relevant details in the PR and Click Create pull request:
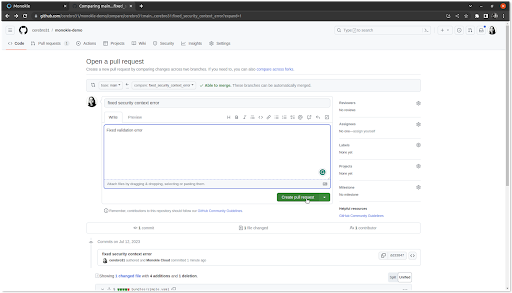
Once the PR is raised, close this tab and head back to Monokle. You can track your PR directly in Monokle Cloud.
4. Track PRs
Monokle is a one-stop solution for managing YAML. Once your changes are part of a PR, track them in Monokle Cloud.
Click on Pull Requests in the toolbar.

From here we can easily manage all the PRs in the repository. It provides an option to filter the PRs based on their status, i.e. open or closed, view all the details in GitHub, compare it across branches, and do a dry-run for Helm and Kustomization with Diff.
Next steps
- Learn more about misconfigurations.
- Review pull requests with automated checks and dry runs (Coming soon)